How to use the different woodturning tools
I here try to give an introduction to the most common way to use the basic woodturning tools. However, the best way to learn to turn is to learn it directly from a more skilled turner, who can show how to do and correct mishabits.
Basics
 There are a number of basic ways to use the turning tool to cut the wood as shown in the drawing to the right. Most turning tools can be used in several ways and can therefore cover more techniques.
Cutting is equivalent to the way a knife cuts when whittling. This is the technique that gives the cleanest cut and the smoothest surface but it is also the most difficult to learn. To be able to control the tool, it is important to keep the bevel (the surface next to the cutting edge where the sharpening has removed metal) touching the surface of the wood not only having contact with the wood at the cutting edge. The bevel must not be pressed hard against the wood as that can give unstability and vibrations, only a very small pressure should be used.
Peeling is equivalent to the way a plane cuts the wood. This technique can result in a smooth surface on the wood but it often gives a rough surface. Again, to control the tool, the bevel has to be in contact with the wood.
Scraping is different mainly because the bevel isn't in contact with the wood. The technique is much easier to learn and control than the two above, but it usually gives a bad cut and a rough torn up surface. Furthermore, scarping removes the wood slowly and it often tears out wood fibres giving a hard work of sanding. Earlier, many amateurs (at least in Denmark) used this technique only, since it is easy to learn and newer 'catches'. Now, most amateur turners use the cutting technique for most truning. Some turners even despise scraping and totally refuse to use it, but it is, in my opinion, still useful sometimes. Scraping can be done with all turning tools, but special tools have been deveolped for this technique.
Shear scraping is something between scraping and cutting. A scraping tool is used on it's side at an angle of aout 45° giving a much cleaner cut than traditional scraping.
To achieve a smooth surface, the tool has to be moved in a smooth movement. To achieve this, the whole body is used to move the tool and not only the hands and arms. The most steady movement is achieved if the hand holding the handle of the tool can rest on the hip.
|
Basic use of the turning tools
The toolrest is moved close to the wood, and the wood is rotated by hand, to verify that it doesn't touch the toolrest. The lathe is switched on and the tool is picked up with one hand on the handle (usually close to the end of the handle) and one hand holds the metal part of the tool. The tool is placed on the toolrest ensuring that the cutting edge isn't in contact with the wood. The hand in the toolrest end is moved so that the fingers rests on the toolrest - where is a matter of taste.
Scrapinig tools are held with the tip pointing downwards, and the tip is carefully moved towards the wood and then up until it starts scraping. Hereafter, the tool is moved left and right to remove wood where desired.
Cutting tools are placed with the bevel on the wood at an angle so that the cutting edge is close to but not touching the wood. Then the handle is lifted slightly so that the cutting edge reaches the wood and starts cutting, still keeping the bevel in contact with the wood. The tool is then moved slowly forward during cutting. If the wood surface is curved, the handle is slowly moved to keep the bevel and the cutting edge in contact with the wood.
When the tool 'catches'
 All turners experience that the tool 'catches' the wood leaving a dent or a grove in the wood. The reason is wrong technique or a short moment of inattention.
When using cutting or peeling technique, catching almost always occur when the bevel isn't touching the wood because the tool has been held at a wrong angle to the wood as shown in the middle of the drawing to th right. Sometimes, catching occur because the corner of the cutting edge reaches the wood.
When shear scraping, catching usually occurs when the tool isn't pointed slightly downwards.
|
The bowl gouge
 The bowl gouge is a relatively new turning tool. Earlier, the spindle gouge was more commonly used because it was difficult to manufacture the bowl gouge. Today, the bowl gouge is the most widely used because it is easier to use. Both bowl gouge and spindle gouge are primarily used with the cutting technique where it is essential that the bevel is in contact with the wood surface
The bowl gouge is probably the turning tool that are found with the largest number of different grinding shapes. Here, only the grinding shape shown on the picture to the right is described.
The basic way to use the bowl gouge is to start placing the tool with the bevel touching and almost parallel to the wood but with the tip (cutting edge) slightly away from the wood. The handle is held slightly below horizontally with one hand on the end of the handle resting on the hip to give stability if possible. The flute (the groove in the metal part of the tool) should be pointing halfway between horizontally and vertically. To make the tool cut, the handle is moved slightly so that the cutting tip of the bowl gouge gets into contact with the wood and when the cutting starts, the tool is moved slowly forwards. The body is moved so that the hand on the end of the handle is kept on the hip. If the tool isn't cutting, the tool can be slowly moved so that the cutting tip is pointing slightly more towards the wood or the tool can be rotated a bit so that the flute is pointing slightly more upwards.
When cutting in a hole as when turning the inner part of a bowl, there is a limit to how shallow the hole can be before the tool hits the rim of the hole. Then, the bevel can't be held in contact with the wood and the control of the tool is lost. To get deeper, one can switch to a bowl gouge with a steeper (shorter) bevel or, better, to a bowl gouge with the so-called 'Irish grind'. Alternatively, one can use different a type of tool: a ring tool, a hook tool or one of the many special types of tools developed for hollowing.
|
The spindle gouge
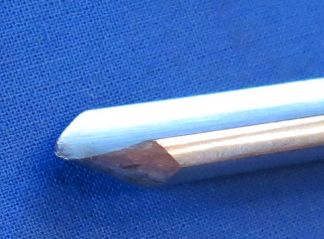 The spindle gouge is also called shallow fluted gouge or continental gouge. It is a somewhat more difficult to learn using the spindle gouge than the bowl gouge so it is best waiting to try it out until you are familiar with the bowl gouge. The spindle gouge is mostly used for spindle turning, hence the name, and it can't get into bowl shapes, but it is excellent for turning coves and beads on spindles. Furthermore, the slim grind of the spindle gouge makes it suited for turning in much shallower slits than the bowl gouge.
The spindle gouge is used in another way than the bowl gouge. Just turning a straight surface on a spindle is done in the same way as with a bowl gouge. However, when turning beads and coves, the tool is used differently. When turning into the bottom of a cove, the handle is gradually moved so that it is perpendicular to the turning axis when the bottom of the cove is reached.
|
The roughing gouge
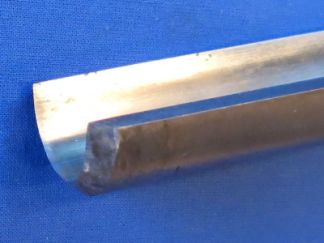 The roughing gouge is one of the easiest turning tools to use, it catches much less than the bowl gouge. It is used more or less as the bowl gouge, usually with cutting technique, mostly for the rough turning of a square blank to a cylinder. The wings of the cutting edge is used more than with the bowl gouge, and it can take heavy cuttings easily. In contrast to the bowl gouge, the roughing gouge can also cut when moving it backwards (moving the tool in the opposite direction of the way the tool's tip is pointing). The roughing gouge can also be used with peeling technique giving a less smooth surface which is no problem as the tool is used for rough turning.
|
The skew chisel
 The skew chisel is often simply called the skew. It can be used in several different ways and, ususally, it gives a very smooth surface, but it requires patience and time to learn to use it. The skew usually has a rectangular cross-section, but it can also be round. It is ground from two sides giving two bevels in contrast to the gouges that are ground from one side only, giving one bevel. The cutting edge is usually not square to the side but skewed, hence the name. It may be straight or curved.
The most commonly used technique used with the skew is the basic spindle turning technique. The tool is placed on the toolrest and the bevel on the wood with the cutting edge at a tilt downwards at an angle of approximately 45° to the turning axis and the cutting edge slightly off the wood. Then, the handle is moved so that the cutting edge gets into contact with the wood and the tool is moved slowly forwards.
Another way to use the skew is to cut a v-shaped notch with the point of the cutting edge. The tip of the skew is pointed directly towards the wood with one bevel parallel to the cutting direction (the one leg of the cut V) and the cutting edge tilted a bit away from the cut surface. When the tool can't get deeper, the tool is backed out and the cut is repeated right next to the first cut but now in the direction of the other leg in the cut V with the other bevel in the cutting direction and the cutting edge tilted a bit away from this other cut surface. The cuts are repated alternating between the two sides widening and deepening the V-cut. This technique can also be used on the ends of the wood. These two techniques are demonstrated on videos on"The Woodturner's Workshop" under
" The 'V' cut" and
" Squaring the end".
|
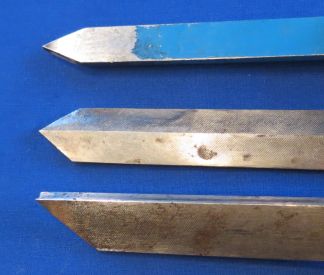
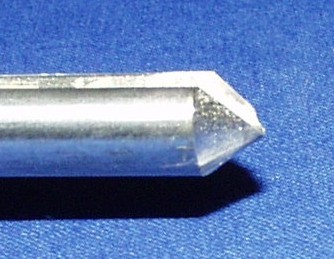
The parting tool
There are different types of parting tools (photo to the right: ordinary, diamond section, fluted) but they are all used in the same way: the tool is placed on it's narrow side on the toolrest and moved towards the wood until the lower bevel touches the wood, constantly with the cutting edge well above the wood (drawing 1). Then the tool is pulled backwards with the bevel keeping contact to the wood until the cutting edge reaches the wood and starts cutting (drawing 2). During cutting the tool has to be moved slowly forwards to keep the bevel in contact with the wood preventing the tool catching.
The parting tool makes a deep narrow slit in the wood and to prevent the tool getting stuck, it can be necessary to back out and widen up the slit a little.
This technique is a peeling technique rather than cutting technique and it can leave a significantly torn and rough surface on the wood. Therefore, many turners prefer a cutting tool to part off the wood.
The parting tool is also used for initial position and depth markings where the torn wood is later removed.
The parting tool may also be used as a scraping tool. Some use it to make the recess in the wood to be used for holding by the jaws of a scroll chuck. This is another example where a torn surface isn't a problem if the recess is removed later.
|
How to adjust the toolrest?
The beginner usually finds it difficult to adjust the toolrest to the correct position. The more experienced turner feels if the toolrest has to be adjusted up or down and doesn't think specifically of how high it is positioned.
The height position of the toolrest depends, among others, on the type of tool used and how it is used. A rule of thumb is to position the top of the toolrest slightly under the rotation axis of the wood. For some tools, e.g. skew and parting tool, the rest has to be lower than average.
Generally, the distance from the toolrest to the wood has to be small, but some tools require a larger distance, e.g. parting tool, skew and most scraping tools.
Turn the wood by hand before switching on the lathe! It is so annoying to have the work destroyed because it hits the toolrest and it may also lead to a dangerous situation. For the same reasons, the lathe should always be stopped before the position of the toolrest is adjusted. Of course, stopping and starting the lathe several times before the toolrest is perfectly adjusted is tiresome, so most people leaves the lathe running while the toolrest is adjusted. This, of course, requires extra care and precision.
|
You are welcome to send me an email if you have comments, corrections or additions.
|
|
|